 |
|||||||||||||||||||||||||||||||||||||||||||||||
 |
|||||||||||||||||||||||||||||||||||||||||||||||
|
|
||||||||||||||||||||||||||||||||||||||||||||||
|
|
||||||||||||||||||||||||||||||||||||||||||||||
|
|
||||||||||||||||||||||||||||||||||||||||||||||
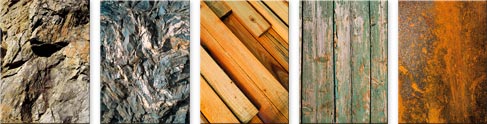
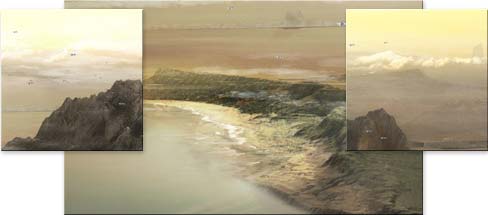
TEXTURES & PHOTOGRAPHY - I used loads of textures and photography to manipulate the whole environment in the pic. I often even had to create separate psd files to create certain textures. I did that for the square structures. A lot of manipulation work went into this part. And the work was needed to assure the right detail for a later print file. |
|||||||||||||||||||||||||||||||||||||||||||||||
 |
|||||||||||||||||||||||||||||||||||||||||||||||
| used a lot for mountain texturing | used for buildings and structures | ||||||||||||||||||||||||||||||||||||||||||||||
 |
 |
 |
|||||||||||||||||||||||||||||||||||||||||||||
|
forest for the landscape part
|
|||||||||||||||||||||||||||||||||||||||||||||||
 |
|||||||||||||||||||||||||||||||||||||||||||||||
|
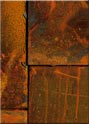
metal, iron texture used for the square structures
|
|||||||||||||||||||||||||||||||||||||||||||||||
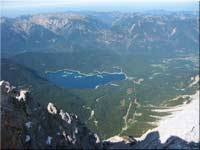
All the files i used were from my personal texture archive and photo archive. The textures i mention here are from a textures cd i got 4 years ago. Now i’m very very happy that i have these pictures because they’re very helpful when manipulating in a way like i do. The one photo we have here was taken on a trip into the alps. Some of my long time watchers know my photography alps panoramas in my deviantart gallery. Some may think it looks familiar... yes. I already used the file for my “this is the way (god made me)” terragen artwork quite some time ago. |
|||||||||||||||||||||||||||||||||||||||||||||||
 |
 |
||||||||||||||||||||||||||||||||||||||||||||||
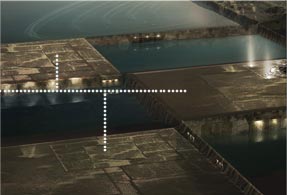
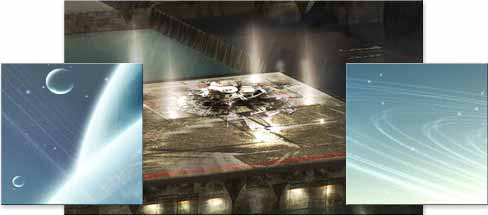
Filters/Render/Lighting Effects - Think of layers. The first one contains the blank terrain without fitting lighting to the manipulations that have been added. The second layer is the texture, without any lighting added to it. The final third layer contains the texture again... but with applied lighting filter. The lighting filters setup matched the lightsource in the actual pic. Means... the lighting comes from the upper mid/right. First that third layer adds the needed realism to the texture. Without the lighting layer the texture would look unnatural and too much like it was maniped in. Sure, my technique may not look too good, but i think you can agree that it looks good enough. |
|||||||||||||||||||||||||||||||||||||||||||||||
 |
|||||||||||||||||||||||||||||||||||||||||||||||
 |
 |
||||||||||||||||||||||||||||||||||||||||||||||
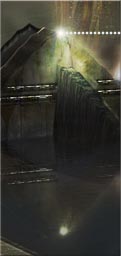
Filters/Render/Lens Flare - Probably the easiest way to create lights, suns or even shiny stars. Take a pitchblack layer in front of a usual picture. Run the lens flare filter on that black layer and set it to screen or linear dodge. Viola. I used it mainly to create standard lights or warning lights. I literally went mad creating that kind of lights to place them whereever i wanted attention by the viewer's eye. |
|||||||||||||||||||||||||||||||||||||||||||||||
 |
|||||||||||||||||||||||||||||||||||||||||||||||
Layer management is a very important aspect when working on a really big project. The more detail you add... the more layer you’ll have. Most would probably merge the layers... but i normally don’t do that because i lose control when merging layers. I often return to layers, i thought i had already finished, to rework something that doesn’t look right under special circumstances. Key is to work with psd intern folders. That helps you a lot to sort all the different elements in you pics. So it came that i had separate folders for each building, alyns elements, the plates on the left and the general landscape texturing. |
|||||||||||||||||||||||||||||||||||||||||||||||
 |
 |
||||||||||||||||||||||||||||||||||||||||||||||
|
sometimes the folders had even subfolders
|
|||||||||||||||||||||||||||||||||||||||||||||||
 |
|||||||||||||||||||||||||||||||||||||||||||||||
 |
|||||||||||||||||||||||||||||||||||||||||||||||
With all the explanations up there the creation process is actually a short story. The most time consuming part was the search for visual faults. Even with my folder system inside the psd file, i had problems to orientate myself within the layers. So i often wasted a lot of time to find the right layer. Some elements, like the plate textures, i worked out in separate psd files. What means that i created a new psd file for texturing. When i manipulated the texture to my needs i copied the texture into the work psd and transformed the texture to make it fit right. Often working with the actual picture psd was very difficult. Because of all the layers inside the psd photoshop started heavily to slow down. I also experienced corrupt layers after saving a psd. A very frustrating thing! Fortunately it was only the layers that were easy to recreate. The corrupt layer thing made this project really an adventure for me. I learned so much with this project. Not only art wise... patience wise too. If you know what i mean. |
|||||||||||||||||||||||||||||||||||||||||||||||
|
 |
||||||||||||||||||||||||||||||||||||||||||||||
 |
 |
||||||||||||||||||||||||||||||||||||||||||||||
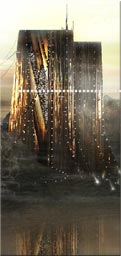
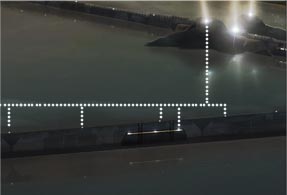
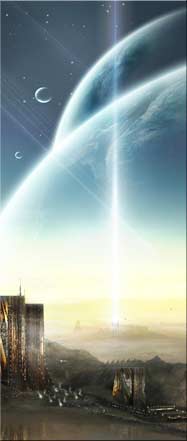
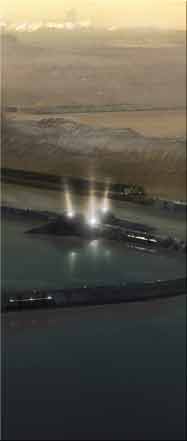
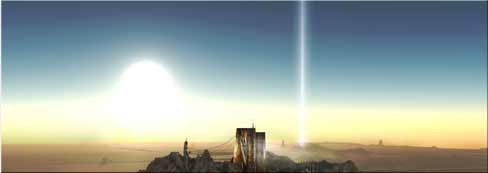
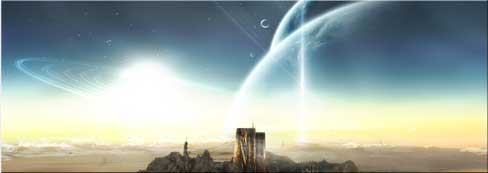
The spotlight idea came very late too. I discovered a lighbeam tutorial at deviantart.com and started to play around with it. Soon i tried my own ideas with it and so it came that i added those spotlights. Good that i created them. I think the pic wouldn’t look half as impressive, realistic and futuristic without the lights. |
|||||||||||||||||||||||||||||||||||||||||||||||
 |
|||||||||||||||||||||||||||||||||||||||||||||||
 |
|||||||||||||||||||||||||||||||||||||||||||||||
Alyns part is a little story of its own. Luckily alyn was able to send me a psd file that contained all important layers of his part. Since my vision was a bit different, in comparison to alyns ideas, i needed the layers. Alyn, of course, merged some of the layers, but in in the end the file was still about 200mb large. Alyns version brought up some ideas in my head that i did not had before. The background clouds for example. They created a very good sense for depth landscape wise. So i took that part from alyns version. Added and removed stuff to make everything look and fit right. |
|||||||||||||||||||||||||||||||||||||||||||||||
 |
|||||||||||||||||||||||||||||||||||||||||||||||
 |
|||||||||||||||||||||||||||||||||||||||||||||||
Alyns spaceships were made excellently too. Though i reduced the masses in the background around the towers. I also reworked the ships on the plates on the left side.I wanted all the attention on the buildings and the structure. So i took out all the trouble in front of thet scenery. Made one ship look like docking there. And must finally say that i really like that part of the pic. Thanks to alyn and his skills i finally completely got the picture i always had in mind! Or at least a version that comes very close to the pic i had in mind.
This little flash animation concludes my little walkthrough. The animation shows you how the picture developed with each layer. The layers aren’t completely chronological.
|
|||||||||||||||||||||||||||||||||||||||||||||||
 |
|||||||||||||||||||||||||||||||||||||||||||||||